How to configure a project and repository to support secure pipelines?
It can be done in Azure DevOps in an easy way, so read along and configure with me some security best practices for your DevOps environment.
Prerequisites
You must create an Azure DevOps Organization and one project for some exercises, for more info see:
To get the most out of the exercises I recommend that you have a little understanding of Azure DevOps and pipeline management. If you don’t have the experience, no worries I will cover you and visit the courses below:
If you are new to Azure and the infrastructure or development world I recommend getting some knowledge about the following topics:
Setup the environment
Task 1: create a new project in Azure DevOps
- Navigate to https://dev.azure.com and open your organization (newly created or an existing one).
- Open the organization settings at the bottom left of the portal and then Projects under the general section.
- Select the New Project option and use the following settings:
- name: SecureCodeShop
- visibility: Private
- Advanced Version control: Git
- Advanced Work Item Process: Agile
- Click on create new project.
Now that the project is created, manage the permissions and settings for each project separately by going to the Project settings menu and selecting the appropriate team project. If you have multiple users or teams working on different projects, you can also assign permissions to each project separately.
Task 2: Create a new repository and set the correct permissions
- Select the organization name in the upper left corner of the Azure DevOps portal and select the new SecureCodeShop project.
- Select the Repos menu.
- Select the Initialize button to initialize the new repository by adding the README.md file.
- Open the Project settings menu in the lower-left corner of the portal and select Repositories under the Repos section.
- Select the new eShopSecurity repository and select the Security tab.
- Remove the Inherit permissions from a parent by unchecking the Inheritance toggle button.
- Select the Contributors group and select the Deny dropdown for all permissions except Read. This will prevent all users from the Contributors group from accessing the repository.
- Select your user under Users and select the Allow button to allow all permissions.
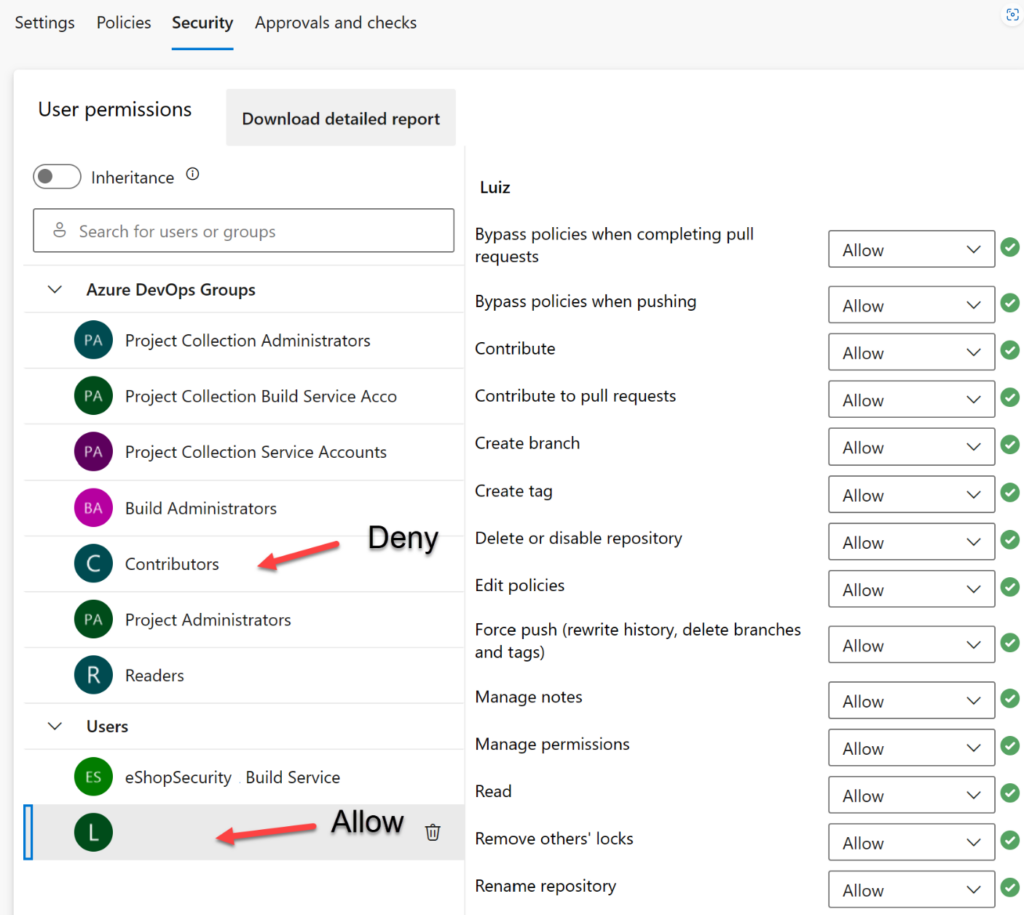
- (Optional) Add a specific group of users, or users that you want to grant access to the repository and run pipelines from the eShopOnWeb project. Click on the search box, enter the name of the group, select it, and then set the permissions you want to allow or deny for the group or user.
Now only the user you assigned permissions and the administrators can access the repository. This is useful when you want to allow specific users to access the repository and run pipelines from the SecureCodeShop project.
Conclusion
Now we have set up a new project in DevOps and set the permissions correctly for the new repository.
We are good to go and in the following blog I explain some yaml files and more options to setup for creating a secure DevOps environment.
Please follow along with the blog series about Secure an Azure DevOps environment and learn by doing!
Thank you and happy coding!
